Adobe Photoshop Level 2
Assignment 1: Reviewing Skills
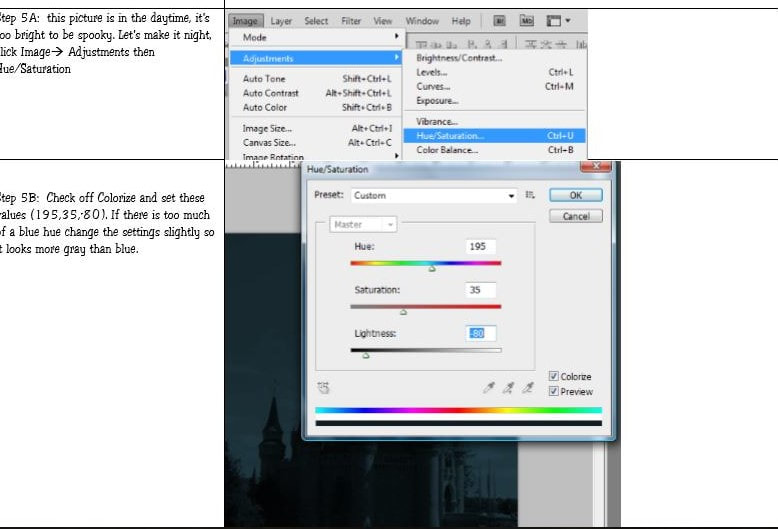
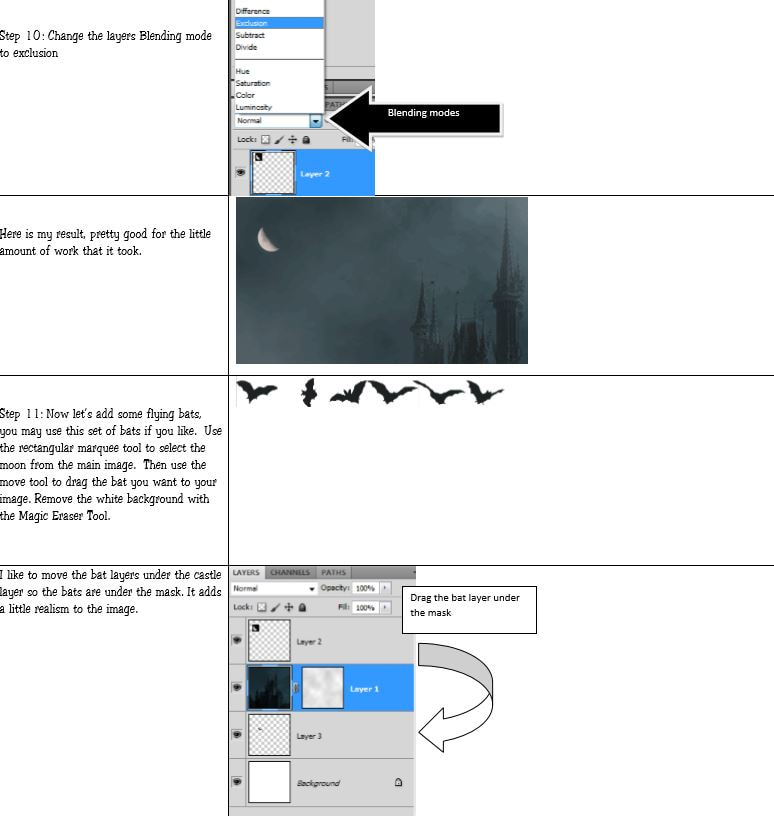
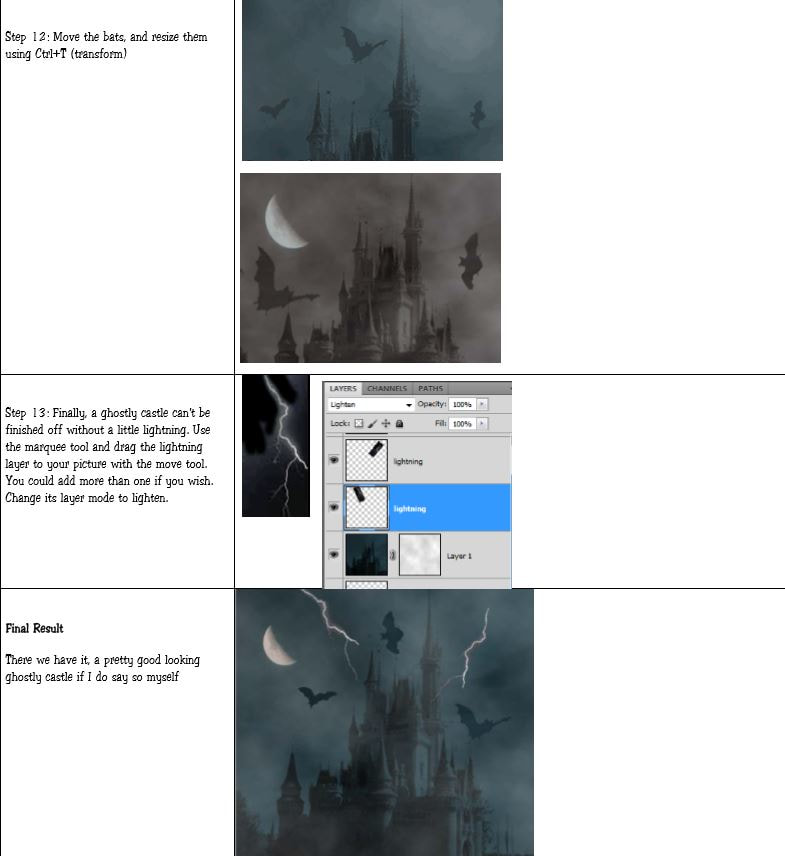
Transform a castle from daytime to night.
Directions:
- Find a picture of a castle, bats, a moon, and lightning and save them to your folder.
STEP 1:
Open a new document in Photoshop - Go to file -> new --> click on the web tab --> select web large and then create
STEP 2:
Go to the 'edit' tab and select the fill option. Change the first box from 'foreground color' to 'white'
STEP 3:
Go to 'file' then 'place embedded' and select your castle photo.
Continue with the rest of the steps for the assignment, please disregard the step numbers.

Assignment 2: Warp Images
Open the file below and use the information provided to choose an image to warp. Follow the directions and submit your finished image to Schoology.
| warp_images.pdf |
Assignment 3: Advanced Color Options
You will be learning about the following techniques:
Directions: Of these eight techniques, your job is to choose four to apply to photos of your choice. Create a new folder within your folder and name it "Advanced Color Options." Select and save four photos that you want to edit. Next, use Photoshop to edit each photo using one of your four selections. When you are done, save each photo as a JPEG and submit all 4 photos on Schoology under the "Advanced Color Options Assignment."
- Changing hue and saturation
- Using the invert command
- Using selective colors
- Posterizing an image
- Using photo filters
- Using the channel mixer
- Using the replace color function
- Localized color corrections
Directions: Of these eight techniques, your job is to choose four to apply to photos of your choice. Create a new folder within your folder and name it "Advanced Color Options." Select and save four photos that you want to edit. Next, use Photoshop to edit each photo using one of your four selections. When you are done, save each photo as a JPEG and submit all 4 photos on Schoology under the "Advanced Color Options Assignment."
| advanced_color_options.pdf |
Assignment 4: 3D Objects
Read the information in the PDF below and use it to create a 3D file from scratch (directions begin on Page 5). Do NOT click render once you are finished. Instead, use the snipping tool to take a picture of your image when you are done and submit that to Schoology.
| 3d_objects.pdf |
Assignment 5: Creating an animated GIF
Click here for a full tutorial on how to create an animated GIF.
All the photos you need are already saved on the Desktop of each computer in a folder called "Photoshop Animated GIF"
Assignment 6: Adjust and Exaggerate Facial Features
Click here so you learn how to alter facial features. Save and use the close-up photo shown in the tutorial or find your own similar one online.
Assignment 7: Add a Rainbow to a Photo
Click here to learn how to add a realistic rainbow to any photo.
Assignment 8: Combine Images into a Creative Photo
Click here for a set of video tutorials to learn creative compositing techniques for combining images in Photoshop.
All the photos you need are already saved on the Desktop of each computer in a folder called "Photoshop Combining Images."
Assignment 9: Add Falling Snow to a Photo
Click here to learn how to add realistic falling snow to any photo.
Assignment 10: Sunlight Through Trees Effect
Click here to learn how to do this realistic effect in Photoshop.
Assignment 11: Create a Mirror Image Effect
Click here to learn how to mirror an image with Photoshop, turning one side of a photo into a mirror reflection of the other.
Assignment 12: Flip, Mirror and Rotate Image Designs and Patterns
Click here to learn how to flip, mirror and rotate a single image in Photoshop to create fun and interesting designs and patterns. Also, create unique looks for the effect by experimenting with Photoshop's layer blend modes.
