Introduction to Photo Editing in Adobe Photoshop
Begin by clicking here to view a Visual Directory of Photoshop and learn about some of the different adjustment layers you can create.
Assignment 6 - Photo Editing
1. Choose a photo to use for this assignment. It should have some type of landscape in it and several medium/small items in the background. Here is an example of the type of image you should use:
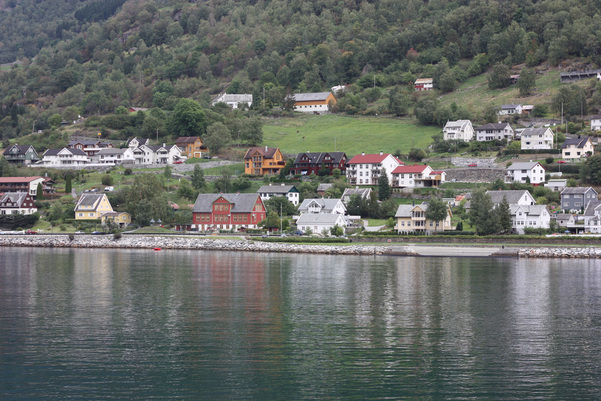
| norway.jpg |
2. Create a new adjustment/fill layer by clicking the icon on the bottom of your layers panel.
3. Select the Brightness/Contrast layer. Notice how a new layer and layer mask are created. Adjust the layer according to your preferences.
4. Create another new adjustment layer and select the hue/saturation option. This will allow you to adjust the colors in your image.
Key Tip: Creating an adjustment layer also creates a layer mask, so iIf there is one section of color you feel is too bright or vibrant, you can use the erase tool to "hide" that section and return it to its original color.
5. Create a new layer by choosing Layer > New > Layer
6. Select the spot healing tool from the left toolbar. This tool is used to remove small unwanted objects.
Once you have selected the tool make sure the "content aware" button is selected and that "sample all
layers" is checked off.
7. Remove any distracting or unwanted objects from your photo.You can adjust the brush size to match the size of what you need to remove.
8. Experiment with different adjustment tools to enhance your photo! Before doing this click the first layer of your photo and then hold the shift key and click the last layer. All of your layers should now be selected. Then go to Filter > Convert for Smart Filters. This will place your content into the protected "wrapper" of a smart object so the filters you apply happen to the "wrapper" not the original layers.
**Add a total of 3 more filters to your image. Save your image as a photoshop file and then save another copy as a JPEG image and submit to Engrade**
Assignment 7 - Make a Photo Look Like a Painting
Assignment 8 - Selective Color Effects
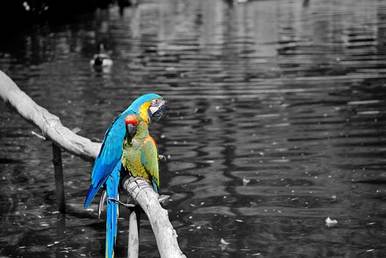
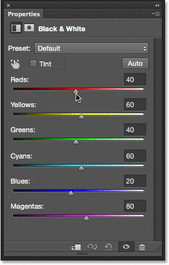
Step 1: Add a black & white adjustment layer
Click on the New Fill or Adjustment Layer icon at the bottom of the Layers panel and select black & white.
You can then make adjustments by using the sliding bars, or choose to let Photoshop auto adjust the image for you.
Step 2: Reveal some of the original color by selecting the brush tool
When a new adjustment layer is created, a layer mask is created as well. You can reveal part of the original full color image through the adjustment layer by painting with black on the layer mask. Select the Brush Tool from the Tools panel and choose the brush style/size you want. Then begin painting the part of the image where you want to reveal the original color.
**Bonus Additional Step**
If you want to restore a some of the photo's original color, lower the opacity of the adjustment layer. You'll find the Opacity option in the upper right of the Layers panel. By choosing around 75% you will allow part of the original color to show through.
